VTU Major Project Phase 2 Complete Guide for Final-Year Students
A complete guide to VTU Major Project Phase 2, including project selection, development, documentation, testing, presentation, and viva preparation.
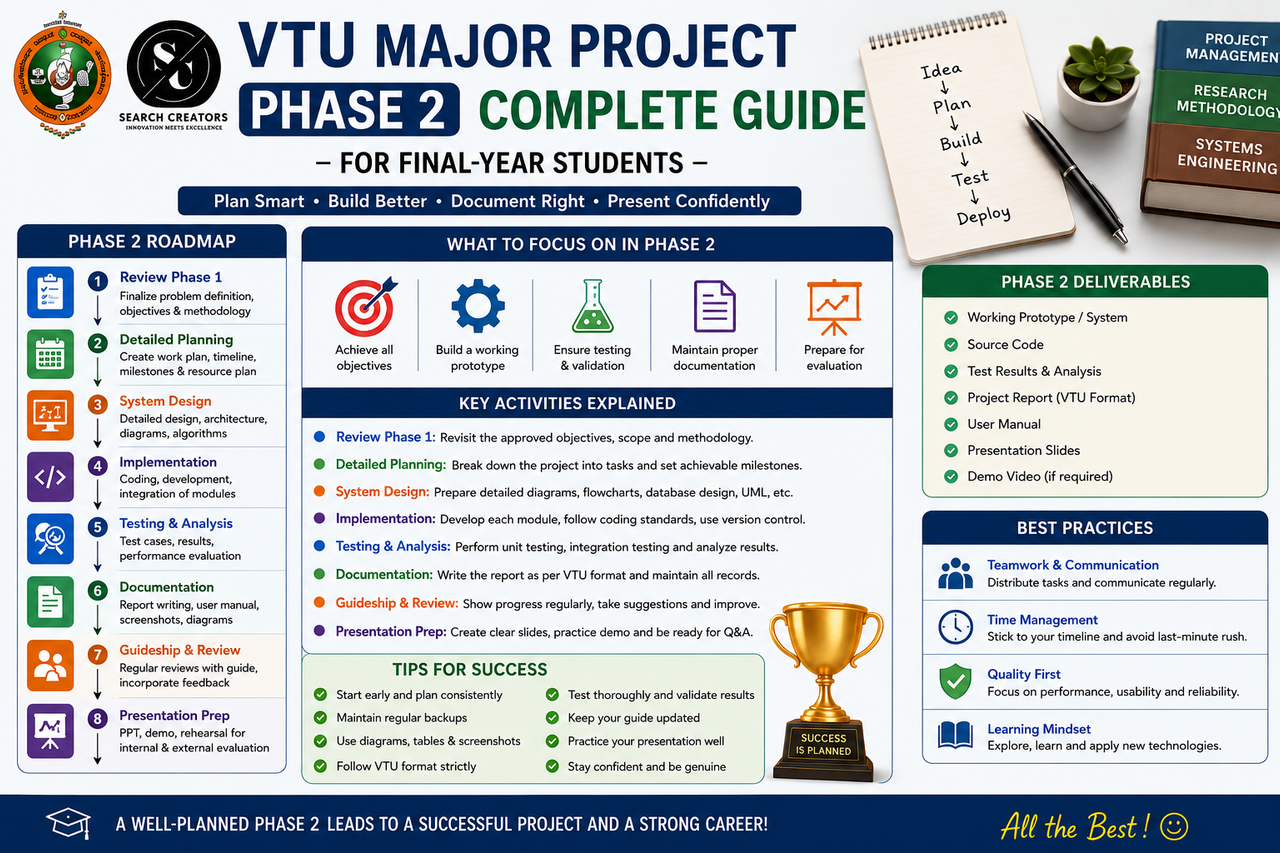
VTU Major Project Phase 2 Complete Guide
The VTU Major Project Phase 2 is an important part of the
final-year engineering curriculum. During this phase, students are expected to
convert their project idea into a complete working system.
Students must complete the implementation, testing,
documentation, demonstration, presentation, and viva preparation within the
given academic schedule.
This guide explains the complete process in simple steps.
What Is Major Project Phase 2?
Major Project Phase 2 is the implementation stage of the
final-year project. In the earlier phase, students usually select the project
topic, identify the problem, conduct a literature survey, prepare the system
design, and present the proposed methodology.
In Phase 2, students develop and test the complete
application.
The final submission normally includes:
- Working
project
- Project
source code
- Project
report
- Presentation
- System
diagrams
- Test
results
- Output
screenshots
- Viva
preparation
- Demonstration
Step 1: Confirm the Project Requirements
Before starting development, students should clearly
understand the project requirements.
Discuss the following points with the guide:
- Project
title
- Problem
to be solved
- Target
users
- Technologies
- Main
modules
- Expected
output
- Hardware
requirements
- Software
requirements
Avoid changing the project title repeatedly after
development has started.
Step 2: Divide the Project into Modules
A large project becomes easier when it is divided into
smaller modules.
For example, an AI-based healthcare project may contain:
- User
registration
- User
login
- Dataset
management
- Model
training
- Disease
prediction
- Result
generation
- Report
download
- Admin
dashboard
Each team member can take responsibility for one or more
modules.
Step 3: Select the Technology Stack
Choose technologies based on the project requirements.
Frontend
- HTML
- CSS
- JavaScript
- Bootstrap
- React
- Flutter
Backend
- Python
Flask
- Django
- Java
Spring Boot
- Node.js
- PHP
Database
- MySQL
- SQLite
- MongoDB
- Firebase
- PostgreSQL
Artificial Intelligence
- Scikit-learn
- TensorFlow
- PyTorch
- OpenCV
- YOLO
- Natural
Language Processing
Select technologies that your team can understand and
explain during the viva.
Step 4: Develop the User Interface
Create a simple and professional user interface.
The application should have:
- Clear
navigation
- Login
and registration
- Proper
form validation
- Responsive
pages
- Readable
text
- Error
messages
- User-friendly
buttons
Avoid adding too many unnecessary animations or complicated
designs.
Step 5: Develop the Backend
The backend performs the main operations of the project.
It may handle:
- User
authentication
- Data
storage
- Prediction
- File
uploading
- Report
generation
- Notifications
- Admin
controls
- API
integration
The backend should validate user input and handle errors
properly.
Step 6: Integrate the Database
The database stores project information.
Common data stored in a project include:
- User
details
- Login
credentials
- Uploaded
files
- Predictions
- Reports
- Complaints
- Transactions
- Attendance
records
Create a proper database structure with tables, fields, primary
keys, and relationships.
Step 7: Test the Project
Testing is necessary before the final demonstration.
Perform the following tests:
Functional Testing
Check whether every module works correctly.
Validation Testing
Enter incorrect and empty values to verify form validation.
Database Testing
Verify whether records are properly stored, updated, and
deleted.
Performance Testing
Check whether the system works smoothly with multiple
records.
User Interface Testing
Verify buttons, forms, links, and navigation.
Record the expected result and actual result for every test
case.
Step 8: Prepare the Project Report
The project report should explain the complete work.
A common report structure contains:
- Introduction
- Literature
Survey
- Problem
Statement
- Objectives
- Requirements
- System
Design
- Methodology
- Implementation
- Testing
- Results
- Conclusion
- Future
Scope
- References
Add architecture diagrams, use-case diagrams, sequence
diagrams, database diagrams, screenshots, and test cases.
Step 9: Prepare the Presentation
The presentation should be simple and explainable.
Include the following slides:
- Project
title
- Team
members
- Introduction
- Existing
system
- Problem
statement
- Proposed
system
- Objectives
- Architecture
- Modules
- Technologies
- Screenshots
- Results
- Advantages
- Future
scope
- Conclusion
Avoid placing long paragraphs on slides.
Step 10: Prepare for the Viva
Every team member should understand:
- Project
purpose
- Technologies
- Individual
contribution
- Database
- Algorithms
- Architecture
- Advantages
- Limitations
- Testing
process
- Future
improvements
Practice explaining the project in two to three minutes.
Common Mistakes to Avoid
- Selecting
an extremely complicated project
- Copying
a project without understanding it
- Delaying
implementation
- Ignoring
testing
- Using
poor-quality diagrams
- Adding
screenshots without explanation
- Depending
on only one team member
- Preparing
the report at the last moment
Conclusion
VTU Major Project Phase 2 requires planning, teamwork,
implementation, testing, documentation, and presentation. Students should
complete each stage systematically instead of waiting until the final review.